Knife Sheath - A Simple One
Now, I have to ask you not to look at the knife itself - it is a third rate actor I got very cheap just to stand in for the real thing - I wanted a cheap one to use for a range of sheaths I want to make and I did not want to worry about an expensive knife as part of the exercise. This one cost me less than a dollar.
This sheath is one of the simplest you can make, with the least amount of tools.
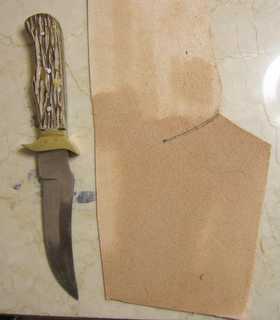
The leather is cut with enough excess to make sure there will be plenty to go round the knife.
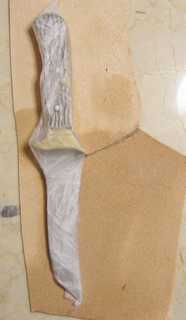
The knife is wrapped in cling wrap to make sure it does not rust or put a black metal stain on the leather.
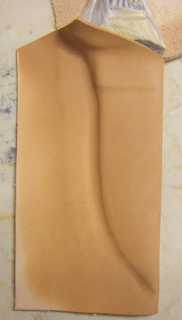
The leather is not stretched over the knife so that there is no tension on the sheath - there is therefor no reason to clamp down the sides of the sheath when it is drying out. After rubbing it into shape with my fingers, I simply let it sit overnight to dry.
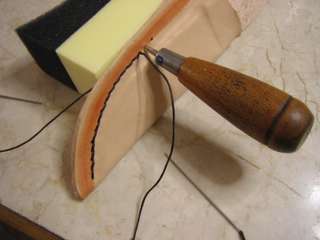
When dry, the excess leather is trimmed off, the stitch line is marked and the sheath is stitched. A very dense sponge behind the leather helps to poke the holes with an awl - it supports the leather so that your fingers do not have to be behind the leather and dodge the very sharp awl.
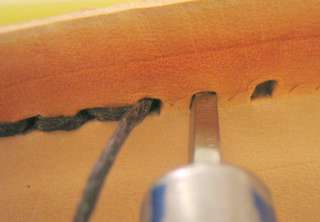
The diamond shaped holes of the stitching awl causes the stitches to lie next to each other and appear very neat.
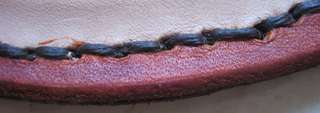
I was not satisfied with the staining on the edge so I redid it after I had finished the stitching.
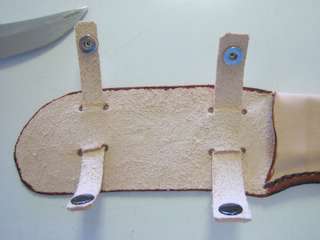
Two very simple straps are installed on the back behind the knife handle - this will hold the handle against the leather or the leather against the knife. In this very simple sheath there is no provision for carying the sheath on your belt.

All that remains is a treatment with Dubbin and this sheath is done!
This sheath is one of the simplest you can make, with the least amount of tools.

The leather is cut with enough excess to make sure there will be plenty to go round the knife.

The knife is wrapped in cling wrap to make sure it does not rust or put a black metal stain on the leather.

The leather is not stretched over the knife so that there is no tension on the sheath - there is therefor no reason to clamp down the sides of the sheath when it is drying out. After rubbing it into shape with my fingers, I simply let it sit overnight to dry.

When dry, the excess leather is trimmed off, the stitch line is marked and the sheath is stitched. A very dense sponge behind the leather helps to poke the holes with an awl - it supports the leather so that your fingers do not have to be behind the leather and dodge the very sharp awl.

The diamond shaped holes of the stitching awl causes the stitches to lie next to each other and appear very neat.

I was not satisfied with the staining on the edge so I redid it after I had finished the stitching.

Two very simple straps are installed on the back behind the knife handle - this will hold the handle against the leather or the leather against the knife. In this very simple sheath there is no provision for carying the sheath on your belt.

All that remains is a treatment with Dubbin and this sheath is done!


0 Comments:
Post a Comment
<< Home